Faux Postage Technique!
Sandy Sandrus has written this tutorial on behalf of Just For Fun Rubber Stamps. If you visited any of the stamp shows that Just For Fun attended last year and visited their booth, this is the demonstration that Debby showed in the booth.
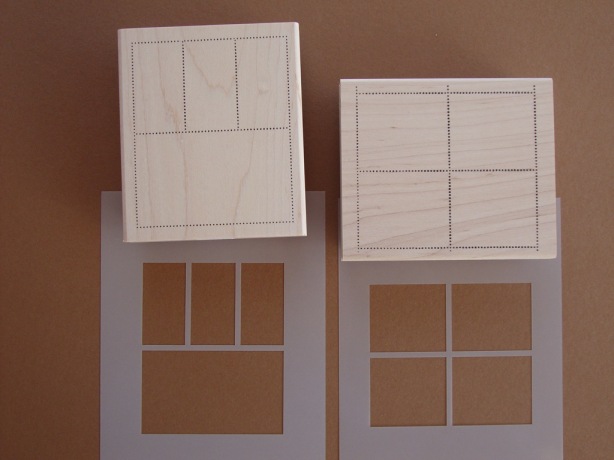
Just for Fun rubber stamps over the years has created over 20 different configurations to be used for the “Faux Post Technique”
First you will need to choose the image that is right for you, along with the rubber stamp you will need to purchase the matching plastic template. Using this template makes the whole process so much easier.
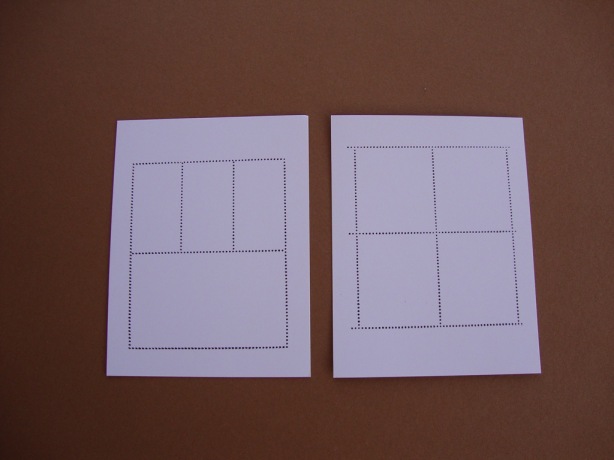
Using a black permanent inkpad, stamp the faux post image on to a piece of white cardstock. Be careful when applying pressure to the stamp not to press too hard. If you happen to get black ink into the center of the openings, this will transfer to the cardstock.
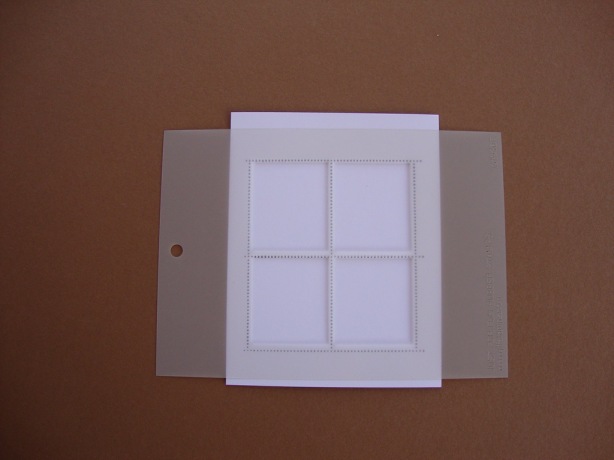
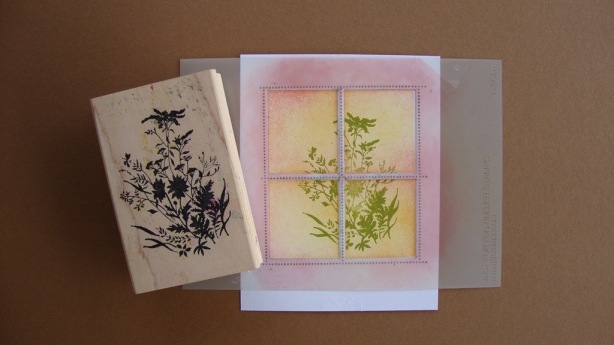
Place the matching plastic template on top of the stamped image. Be sure the template covers all of the dotted design. If you are using the original design G1936 Faux Post Grid, you may need to turn the template ¼ turn until it aligns properly. (TIP) Use some low tack tape to attach the template on top of the stamped image. (Example: Scotch Magic Tape or Invisible Tape) This will allow you to use both hands to design with.
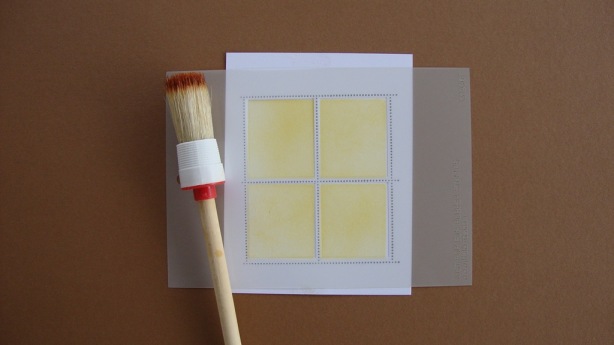
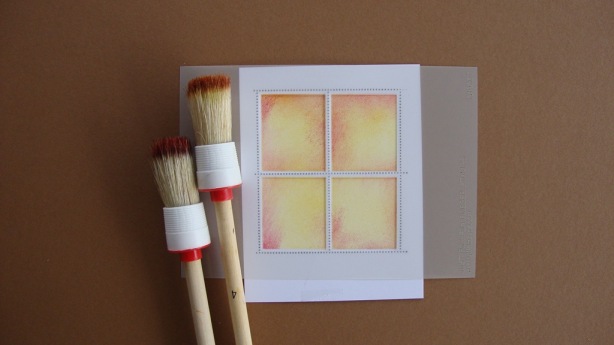
Use stipple brushes to apply light color to the open areas. Your have more control applying your color using stipple brushes. Other alternatives are: foam applicators and sponges. Tap the stipple brush to the inkpad and then to the paper, use a swirling motion to get a nice smooth look.
Next choose another contrasting color ink and stipple around the outer edges.
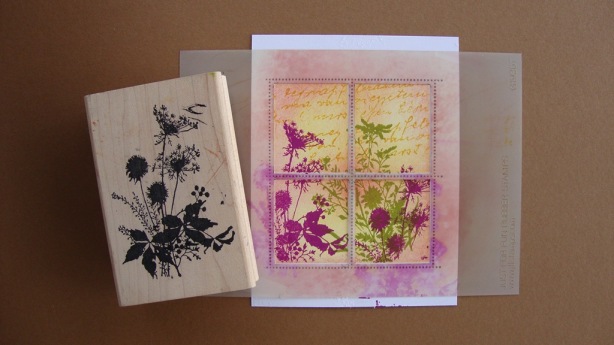
Now you need to choose some fun stamp images and inkpads you want to use to create your “faux post” card. Ink the images and stamp directly on top of the plastic template.
Remove the template, set it aside to clean. I use a wet and dry paper towel. If you happen to use Permanent ink it will stain the template. All you need to use is some stamp cleaner. “StazOn” cleaner works just fine.
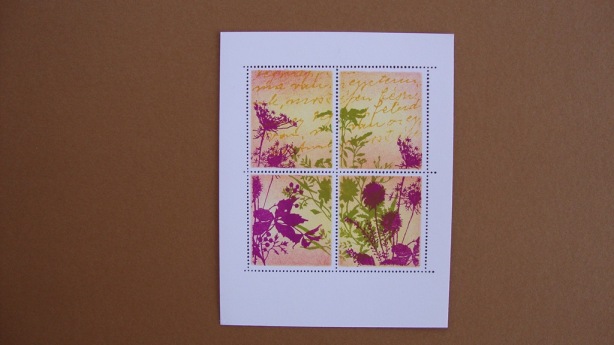
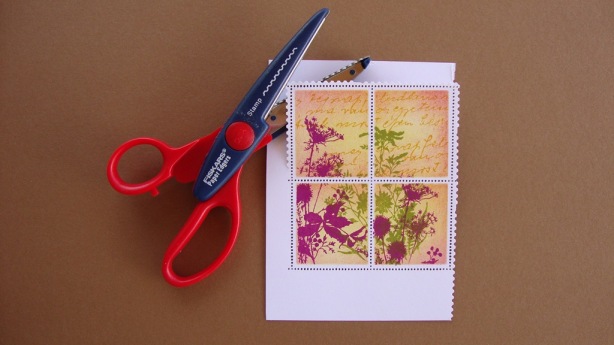
Cut around the outer edge of the finished stamped faux post with decorative scissors named “stamp: by Fiskars, leave just a small white border and make sure you can see the dotted frame.
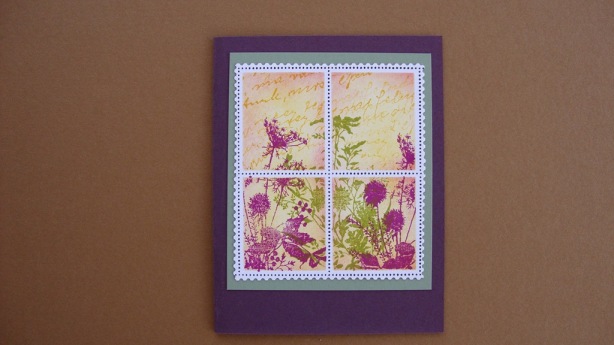
Now you can assemble your card by selecting coordinating colors of cardstock, ribbons and embellishments
G1936 Faux Post Stamp, G1936T Template, F2714 Wildflower Silhouette, F2716 Queen Ann’s Lace, RB7001 design block
Now that was QUICK and EASY…..
Absolutely fabulous tutorial Sandy. I can’t wait to try it myself!
For the life of me, I couldn’t visualize how to use these stamps/templates…..NOW I got it!! (love the colors you chose to work with!!)
I bought the templates years ago not knowing they were for post rubber stamps. Thank you for the tutorial.
I wish you success with your new blog.
Great tutorial, Sandy! I love how everything is perfectly matched! I can’t wait to try this!
I love it! In fact, I really need to try that.
Smiles~
Marilyn